Common Lisp commands
Lem is written and extensible in Common Lisp. You can start writing and compiling Common Lisp code right away.
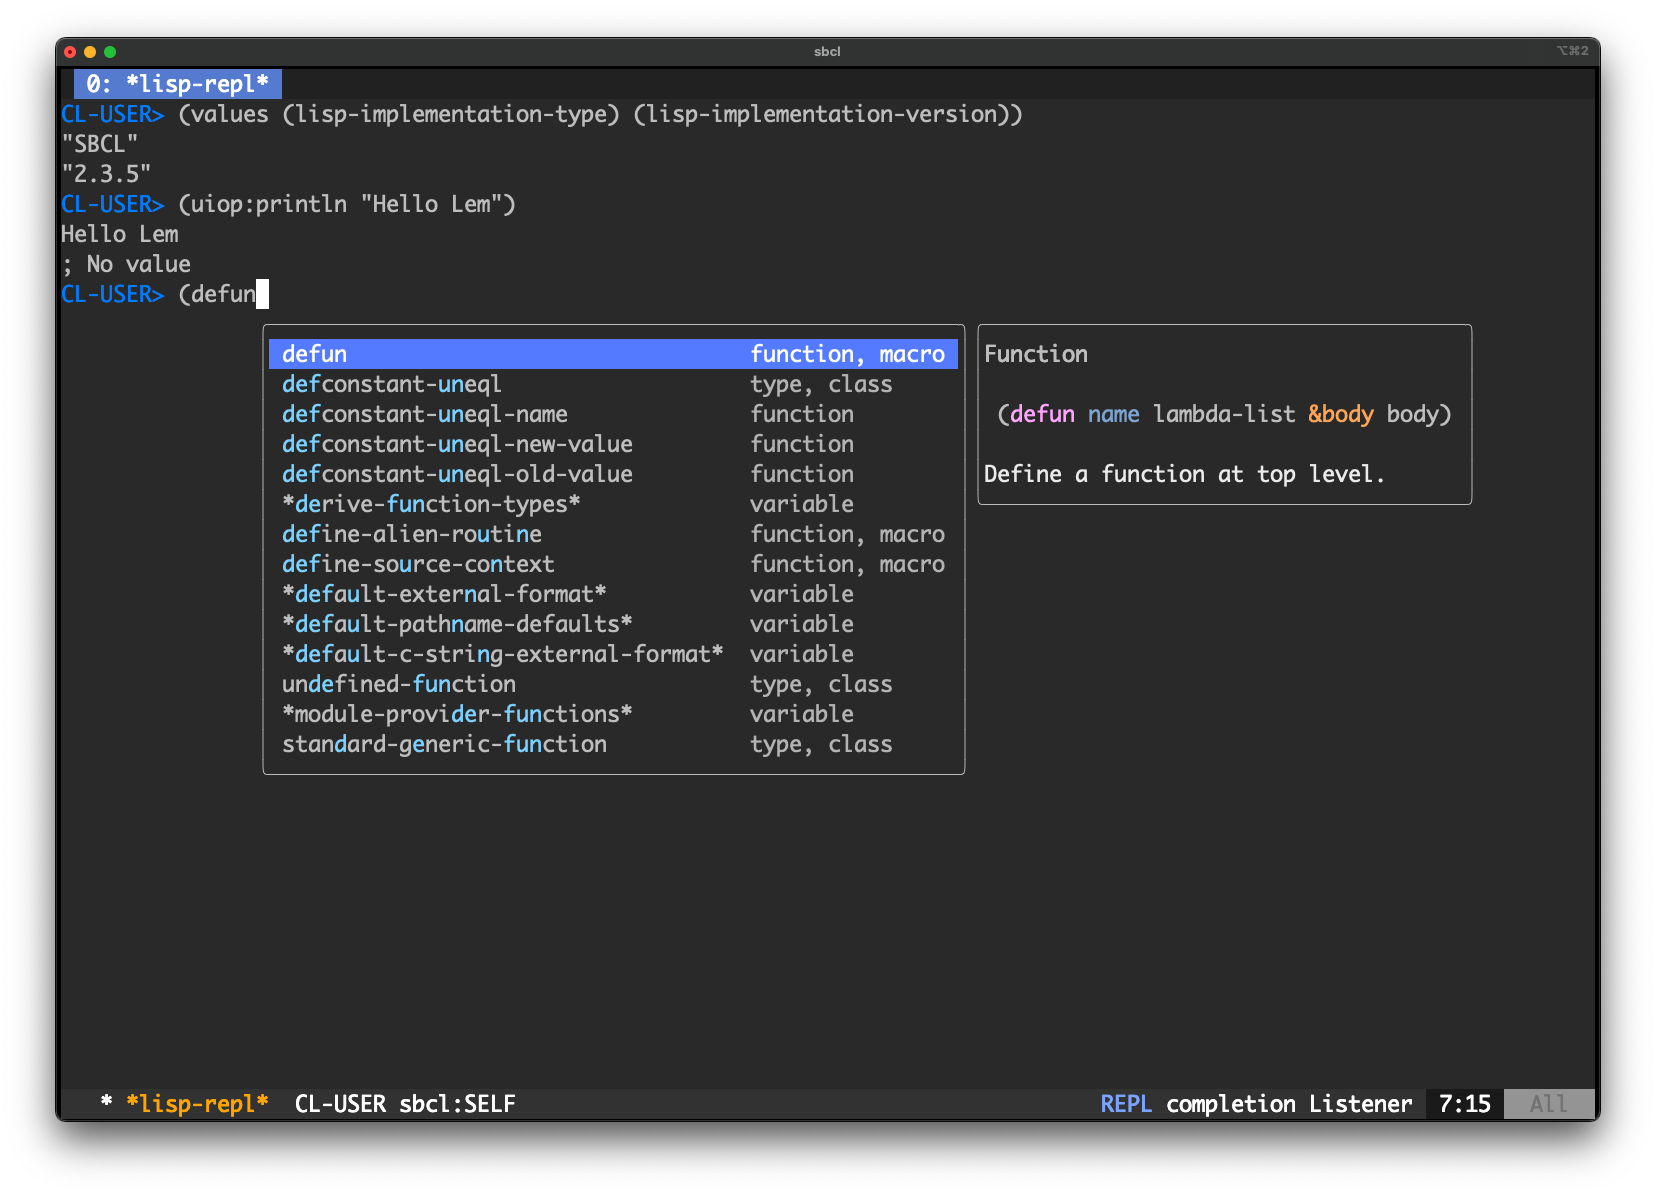
Use TAB-completion, compile a function with C-c C-c and start a REPL with M-x start-lisp-repl or just switch to one with C-c C-z.
Start a Lisp REPL with M-x start-lisp-repl.
To switch to the REPL from a Lisp buffer, even if you didn’t start it before, use C-c C-z. You can use quick commands inside the REPL. They start with a , (comma). For example:
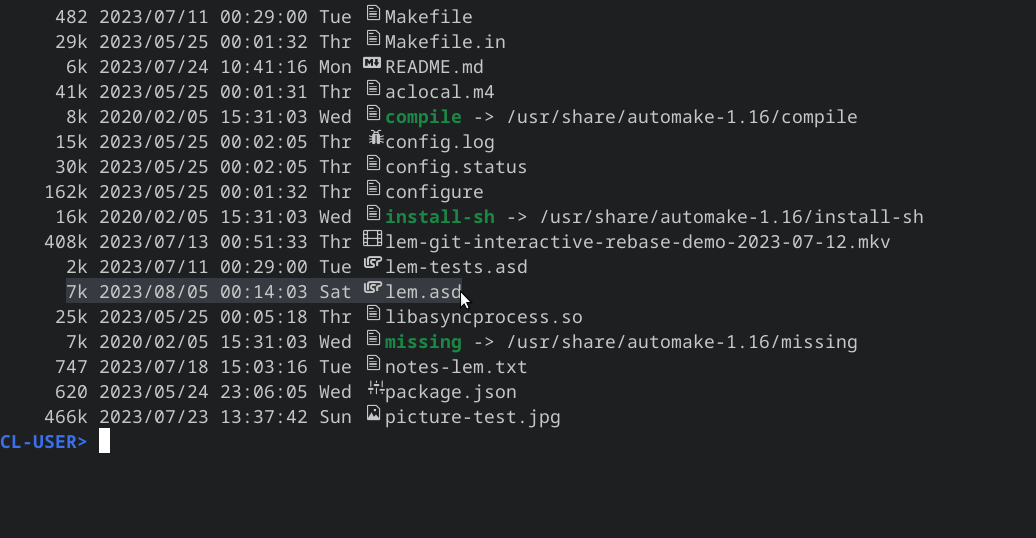
change-packagechanges the REPL’s current CL packagequickload, to choose a Quicklisp system (with autocompletion) and load it.sayonaraquits the REPL.pwdprints Lem’s current working directory.cdchanges it,lslists files and directories. This list has the same form as the list of directory-mode and is interactive: we can visit files at point (see screenshot below).
Inside the REPL, go up to the previous prompt with C-c p (backward-prompt) and down to the next one with C-n n (forward-prompt).
Search in the prompt history with M-r (listener-isearch-history).
You can open Lem with a Lisp REPL with this one-liner:
lem --eval "(lem-lisp-mode:start-lisp-repl t)"
You can do something when the REPL starts by using its lem-lisp-mode:*lisp-repl-hook*.
For example: you have enable vi-mode by default, and you want to enter the REPL in vi’s insert-mode:
(add-hook lem-lisp-mode:*lisp-repl-mode-hook* 'lem-vi-mode/commands:vi-insert)
Note: this hook was added after Lem 2.1.
To compile and load a buffer, use C-c C-k. To compile a function: C-c C-c.
Common Lisp gives you type warnings and other errors at compile time.
To evaluate the last s-expression, use C-x C-e. Lem prints the result in an overlay.
The overlays go away when you edit their preceding definition or when you call M-x lisp-eval-clear.
You can evaluate the last expression and print its result into the
buffer, under the cursor. Use lisp-eval-last-expression-and-insert.
To evaluate some Lisp code globalyl wherever you are in Lem, use M-:.
Use C-c I (M-x lisp-inspect) to get an inspector window about an expression. If the
point is on a symbol, inspect this symbol. It works with objects printed on the REPL.
Use M-x lisp-browse-class-as-tree to display the inheritance tree of a class.
In the screenshot below, you can inspect a class node by clicking on it.
You can also scroll the graph with the same key bindings as cursor movement.
For example, inspect lem::editor-condition or simple-condition.
Lem features an advanced interactive debugger.
You can navigate and
inspect the stacktraces (C-n, C-p), go to the error’s origin (v
on the backtrace), restart a given point of the backtrace (r,
sldb-restart-frame), and so on. Quit the debugger with q, or use a
suggested restart (by entering its number, pressing Enter on it, or
clicking on it).
Use M-. (find-definitions) to go to a symbol definition. This
opens the source file where this symbol was defined. Use M-, to come back.
It works when the cursor is on a Lisp symbol, and also… when it isn’t. In that case, Lem asks you for a symbol with autocompletion of all known symbols of the current Lisp image, and it brings you to this symbol’s definition.
If you can’t find the definition of built-in symbols provided by your implementation, and get the
directory does not exists: ...error, then you may need to specify thesource directoryof your implementation. Add this in your init file:(sb-ext:set-sbcl-source-location "/path/to/your/source-of-implementation/")to specify the source direcoty (givensbclis the underlying implementation). A usual value is"/usr/share/sbcl-source/". If you installed Lem with Roswell (which isn’t the preferred method anymore), you can create the~/.roswell/init.lispinit file, and you can install SBCL source files withros install sbcl --without-install.
“All symbols” really means all the symbols of any package that was loaded in the image. This includes the implementation and Lem’s packages, the code of your current project, and any other third-party library that was loaded in the current image.
This is an efficient method to jump around your code and explore anything loaded in the Lisp image.
The command lisp-search-symbol (C-c C-d s) is similar, but more to the point: it asks for a lisp symbol, with autocompletion, and brings us to the symbol’s definition.
lisp-search-symbol was added after Lem 2.1.
These commands were added after Lem 2.0.
The following two commands are shortcuts around the built-in trace macro:
M-x lisp-toggle-trace(C-c C-t): toggle tracing of the function under point.M-x lisp-trace-list(C-c T): see all the traced functions, select the ones to untrace.
These commands were added after Lem 2.0.
A new feature in micros (Lem’s fork of Swank) allows to display evaluation results on the fly.
By adding (micros:watch some-lisp-form) in your code, you can see
intermediate (and final) results being displayed in the source buffer,
in overlays, next to the watch call.
The macrostep commands are interactive commands that allow to expand the macro at point right inside the source file. It is a great way to understand what the macro is doing, and debug it.
The macroexpand commands expand the macro too, but show the result in an overlay window.
To call macrostep, put the cursor at the opening parentheses and call M-x lisp-macrostep-expand (C-c Return). This will show you an information message saying that q will undo the macroexpand and come back to normal. Your macro is expanded a first time.
Press C-c Return a second time (or call lisp-macrostep-next) to expand the macro once again.
Press q to quit the macroexpand mode and see the original source again. You have more keys to interact with the expansions:
| Command | Key-combination | Function |
|---|---|---|
lisp-macrostep-expand | C-c Return | expand once, enter macrostep mode |
lisp-macrostep-next | Tab, Return | expand the macro once again |
lisp-macrostep-previous | Shit-Tab | previous macro-expansio |
lisp-macrostep-undo | Return | undo previous step |
lisp-macrostep-quit | q | quit and come back to the source |
You can also call M-x lisp-macroexpand-all (C-c M-m) to expand the macro completely, or M-x lisp-macroexpand.
apropos is a built-in Common Lisp function that you can use at the
REPL. Lem provides the command M-x apropos-command that shows the
result in a floating window.
apropos searches for symbols (functions, methods, variables…) whose name contain your search term. For example, at the REPL:
CL-USER> (apropos "random")
ALEXANDRIA::RANDOM-NUMBER
[…]
*RANDOM-STATE* (bound, RANDOM-STATE)
MAKE-RANDOM-STATE (fbound)
RANDOM (fbound)
RANDOM-STATE
RANDOM-STATE-P (fbound)
These commands were added after Lem 2.0.
Try one of these two commands:
hyperspec-at-pointopens a browser to the HyperSpec page for the Lisp symbol the point is on. You can also right-click on a symbol (GUI version).hyperspec-lookuplets you choose a symbol (with auto-completion).
Lem in SDL2 supports double clicks to select s-expressions. A middle mouse click inserts a s-expression.
Lem obviously supports good auto-completion for Common Lisp. It uses its own version of the Swank server.
Use the TAB key to auto-complete a Lisp variable or function.
When you go over the completion candidates, Lem shows you the function signature and its docstring (see screenshot above).
Paredit helps to handle parentheses balanced in your lisp code.
Start it with
M-x paredit-mode
It defines keys on:
- “(” and “)” to keep parentheses balanced
- a double quote (to insert a double quote)
- the delete key
- C-k: “kill” a s-expression, keeping parens balanced.
- C-right: “slurp” to move a closing paren one symbol to the right
- C-left: “barf”, similar but to the left
- M-s: “splice”, to make vanish a set of parens
- M-r: “raise”, to move the expression at point up in the code tree, potentially deleting its parent and sibling expressions
- M-(: “wrap” the following expression inside a set of parens.
See also the Pareto third-party mode for a lispy-like editing.
Lem by default highlights the matching pair when the point is on a
parenthesis. This minor mode is called toggle-show-paren and it is
on by default.
You can bring distinct colours to each pair with this simple command:
M-x toggle-paren-coloring
This was added after Lem 2.1.
For now, Lem testing of Common Lisp is split in two approaches:
buffer-oriented (using detective):
It uses buffer references to get information about the tests in the buffer and send information to the an active REPL.
connection-oriented (using the connection with micros):
It uses
microsto communicate with the underlying connection to send commands and uses custom visual for each tests.
It works with-in the current buffer, it’s configure by default to work with the rove testing framework, but
it can be adapted to work with others, changing the value of the variable *run-test-function-name* for single
test run and *run-suite-test-function-name* for running a test suite.
The commands available are:
M-x lisp-test-run-current: Sends the current test to run on the REPL.M-x lisp-test-run-buffer: Select a test in the buffer to run.M-x lisp-test-run-suite: Run the current buffer suite (define on the top of the buffer).
It works by using the underlying connection to the lisp server,for now, it only works with the rove testing framework.
The commands available are:
M-x lisp-test-runner-run-currentor (C-c C-r): It sends the current test symbol to the connection.M-x lisp-test-runner-run-bufferor (C-c C-R): Run the test suite of the current buffer.

